Introduction
Welcome to the CopilotMaps tutorial!
last updated on 02 November 2024Video Tutorial
Getting Started
In order to properly use Copilot Maps, it is important to understand what are the components involved and how they work together. There are four main components: the Microsoft Flight Simulator 2020, the Microsoft Flight Simulator 2020 SDK, the CopilotMaps desktop app and the CopilotMaps web platform.
The initial main feature of Copilot Maps is to track the position of the user aircraft in the flight simulator in the browser. More features are to come, but for now we are going to focus on the setup that enables this feature to work properly. It is unlikely that this setup will have to change once new features are added to Copilot Maps.
Configuring the Microsoft Flight Simulator 2020 with the SDK
The SDK is needed for Copilot Maps to have access to simulation information, the latter being a process external to the simulator.
First of all, you need to have the simulator and the SDK installed.
To install the SDK, please follow the steps
here. You have to
- • enable developer mode in the flight simulator
- • download the SDK from the Help menu in the simulator, from the Downloads section
After the SDK is installed, you can turn the developer mode off if you want.
Downloading the Copilot Maps desktop app
First of all, please download and unzip the CopilotMaps desktop app from the Desktop App menu in the dashboard or directly from our Github page.
When running the app, Windows Defender will display an 'unrecognized app' pop-up. That is because the app was not signed using
a code signing certificate.
Instead, we published the hash sum of the archived executable on the Github page, next to the archive.

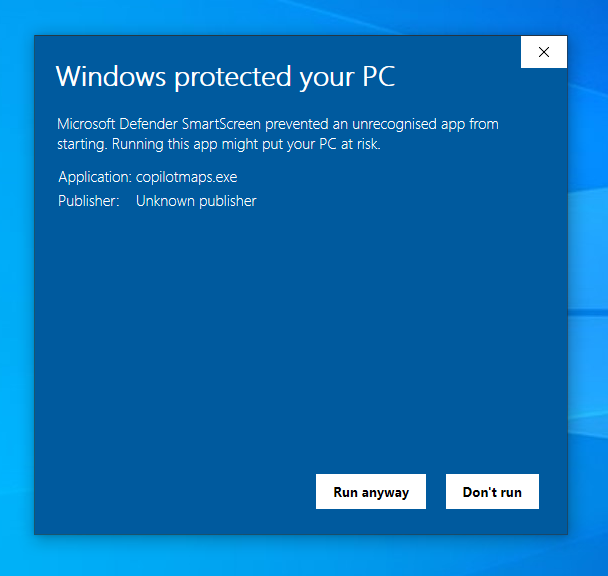
Because the app is not signed, it could be detected as a trojan on systems with outdated Windows Defender. If this happens, please update
your Windows Defender knowledge base by
opening a command prompt window as administrator and running the commands shown below.
cd 'c:\Program Files\Windows Defender'
MpCmdRun.exe -removedefinitions -dynamicsignatures
MpCmdRun.exe -SignatureUpdate
After running the commands, the app will be accepted as legitimate by the Windows Defender.
Verifying the integrity of the Copilot Maps desktop app (optional)
To verify the integrity of the archive, just open a command prompt/power shell window and run the following commands, replacing vA.B.C with the actual version of the app
certutil.exe -hashfile copilotmaps-vA.B.C-win-amd64.zip SHA512Compare the output of that command with the output of
cat copilotmaps-vA.B.C-win-amd64.zip.sha512sumIf you obtained the archive from our release page, the two outputs will be equal.
Configuring the Copilot Maps desktop app
When you first run the app, you will be asked to allow it access to the network.
Please do so (private/local networks should suffice)
as it needs to establish connection to the browser in order to send aircraft positions and other information.
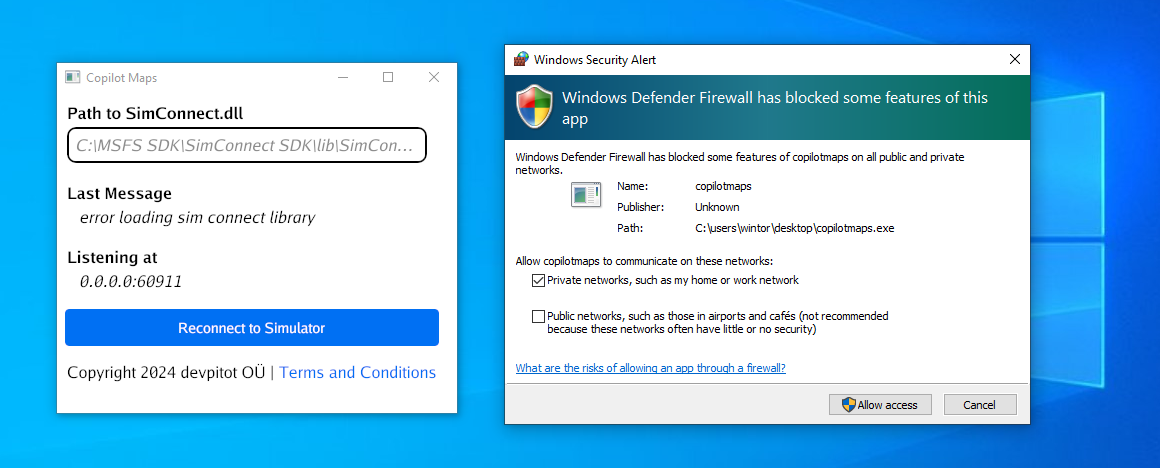
The desktop app currently has one setting for the path to SimConnect.dll, which is part of the SDK you installed at the previous step.
If you installed the SDK in the default location,
it should be something like C:\MSFS SDK\SimConnect SDK\lib\SimConnect.dll.
This is the default value so if the simulator is running, the app should already connect to it automatically.
If you installed it at a different location, just type the path to the SimConnect.dll at that location and press 'Reconnect to Simulator'.
This will save the setting in a settings file in the same folder with the CopilotMaps executable.

Configuring the Copilot Maps web platform
This is an optional step, as the platform should automatically connect to the desktop app if the app is listening on the default port.
There might be situations where the default port is used by a different application. In that case the desktop app will choose a different port.
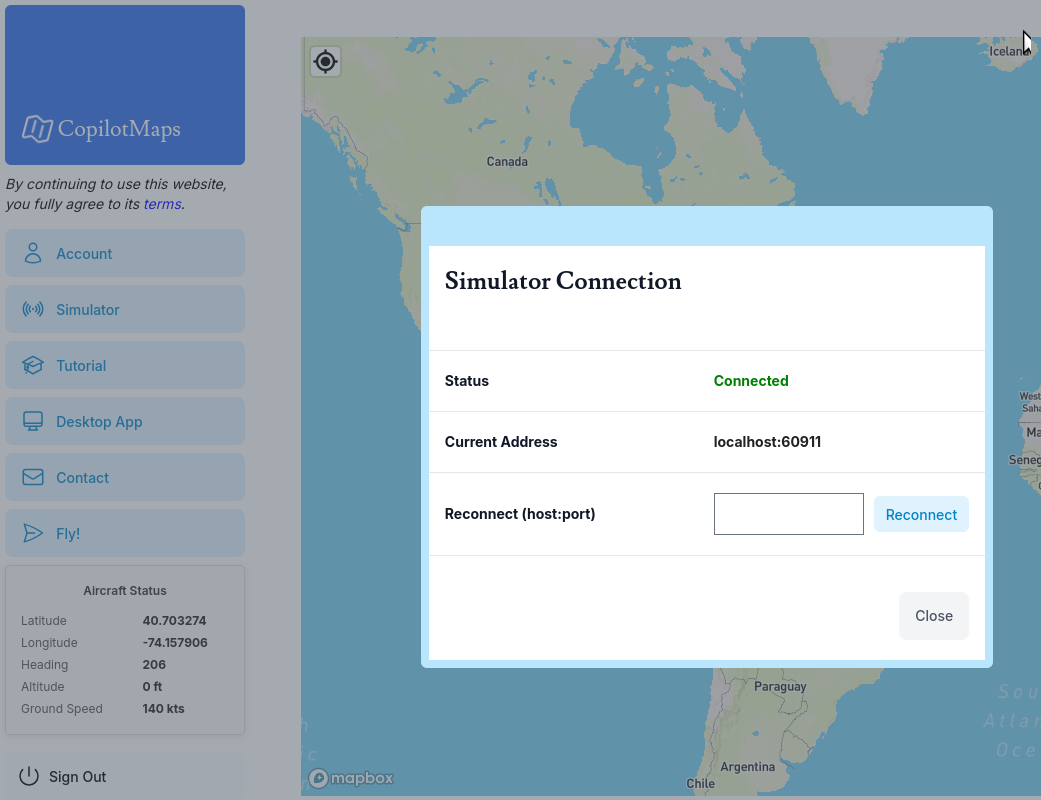
Please open the Simulator menu and check the status. If the status is Connected, you don't have to do anything further.
Otherwise, please check what port the desktop app is listening on and use that to reconnect by typing localhost:port_value clicking on Reconnect.
We encourage you to try setting up CopilotMaps before purchasing the paid subscription, just to confirm that your setup works.
You should see an aircraft element drawn on the map at the location of the aircraft in the simulator.
The aircraft position and heading will be updated every second.
Also, the Aircraft Status label should refresh every second to the newest
aircraft parameters.
If you encounter any problems with the setup, do not hesitate to contact us using the contact form in the dashboard.
The Fly! Feature
Note - This feature is usable with a paid FlightRadar24 subscription plan only, since downloading flight CSV files is not enabled for their free plan.In the near future, we might provide a way for loading FlightRadar24 flights without having to load CSV files altogether. Stay tuned!
The Fly! feature allows you to load FlightRadar24 CSV files as flight plans into the Microsoft Flight Simulator 2020.
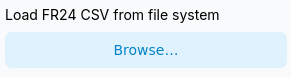
At the top of the menu, you can use the Browse button to load your CSV file.
Once loaded, the flight path will be displayed on the map.

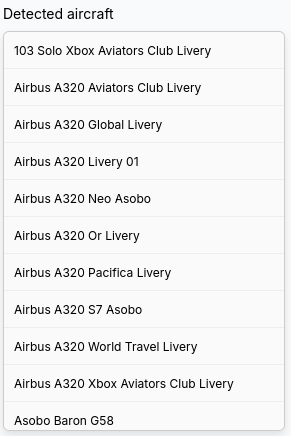
Below the browse button you can find the list of available aircraft. This list is filled with the aircraft that the CopilotMaps app
detects in your Microsoft Flight Simulator 2020 installation folder.
For the list to be populated, the CopilotMaps app has to be running
and connected to the CopilotMaps web platform. If the app is connected and the list is still empty, give it a few seconds as it is refreshed
periodically.
You can use the Selected aircraft input to filter the detected aircraft list in case you are looking for a particular aircraft.
When found, please click on it so that the correct name is displayed back in the selected aircraft field.
You can also manually
override the selected aircraft by simply typing its name (title from its aircraft.cfg file). You can also include the livery
you want as long as the final aircraft name (type + livery) is valid.
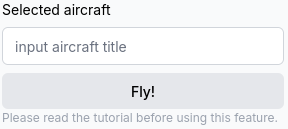
Once you selected an aircraft, the Fly! button will be activated. By clicking it, the flight will be loaded in the simulator.
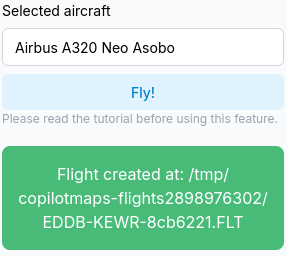
In the simulator, you will find the flight under Activities > Custom Content.
Alternatively, if you are in the World map in the
simulator at the time of pressing the Fly! button, the flight will be loaded and ready to fly automatically.
IMPORTANT
- • using an invalid aircraft name will crash the simulator! Unfortunately, the simulator does not return any error in case something is wrong with the flight and it simply crashes. Something we cannot control.
- • some of the aircraft do not behave well with the loaded flight, for example the 747 or 787. See the supported aircraft list below.
Supported aircraft
The following aircraft have been tested with the CopilotMaps generated flights and worked well
- • Airbus A320
- • Beechcraft King Air 350i
- • Cessna 208B Grand Caravan
- • Cessna Citation Longitude
- • Cessna CJ4
- • DA62
That doesn't mean others do not work, but you might encounter problems with them. From our testing, the Boeings didn't load the flight plan in their MCDU. We'll look into this soon.
Thank you for using and supporting Copilot Maps!